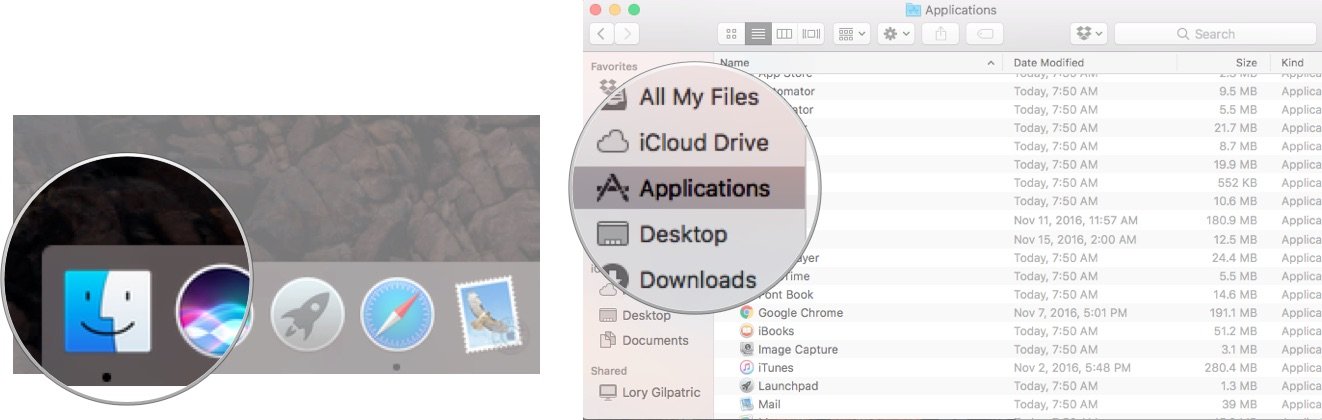
You can search for Terminal using Spotlight or by selecting it in Finder.
- Open a Finder window.
Select Applications from the sidebar.
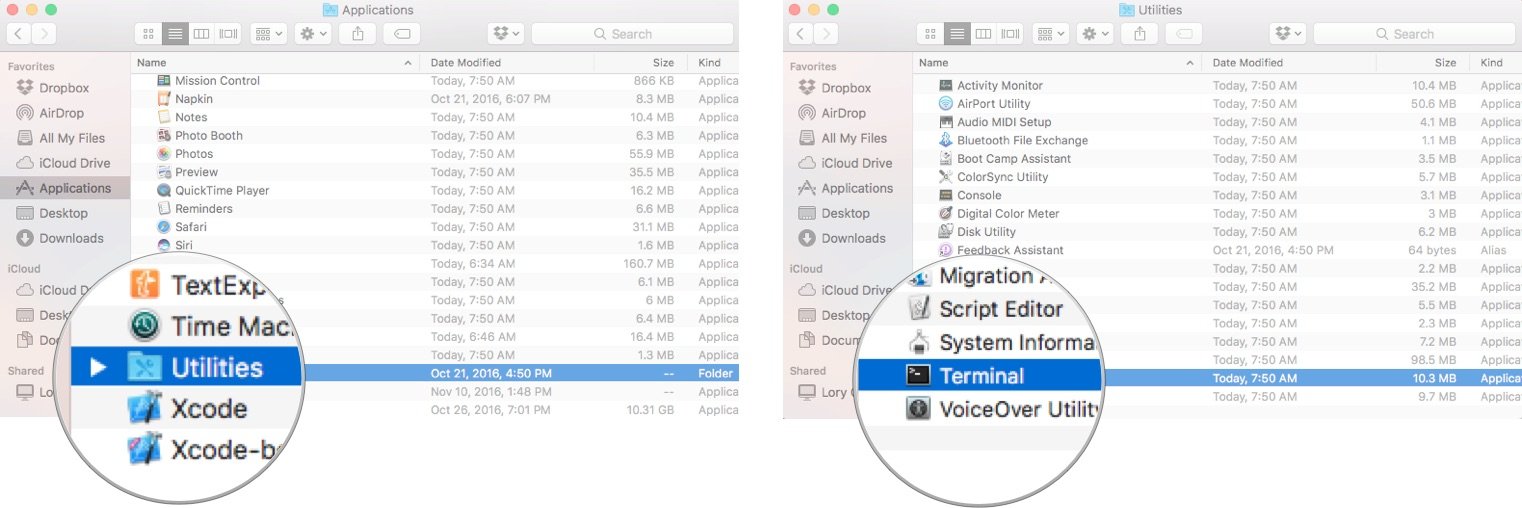
- Double-click on Utilities.
Double-click Terminal.
In the Terminal window, you will need to enter a command to open the Nano text editor. You will need your administrator password, as well.
- Type sudo nano /etc/hosts and then hit return.
Enter your administrator password and then hit return.

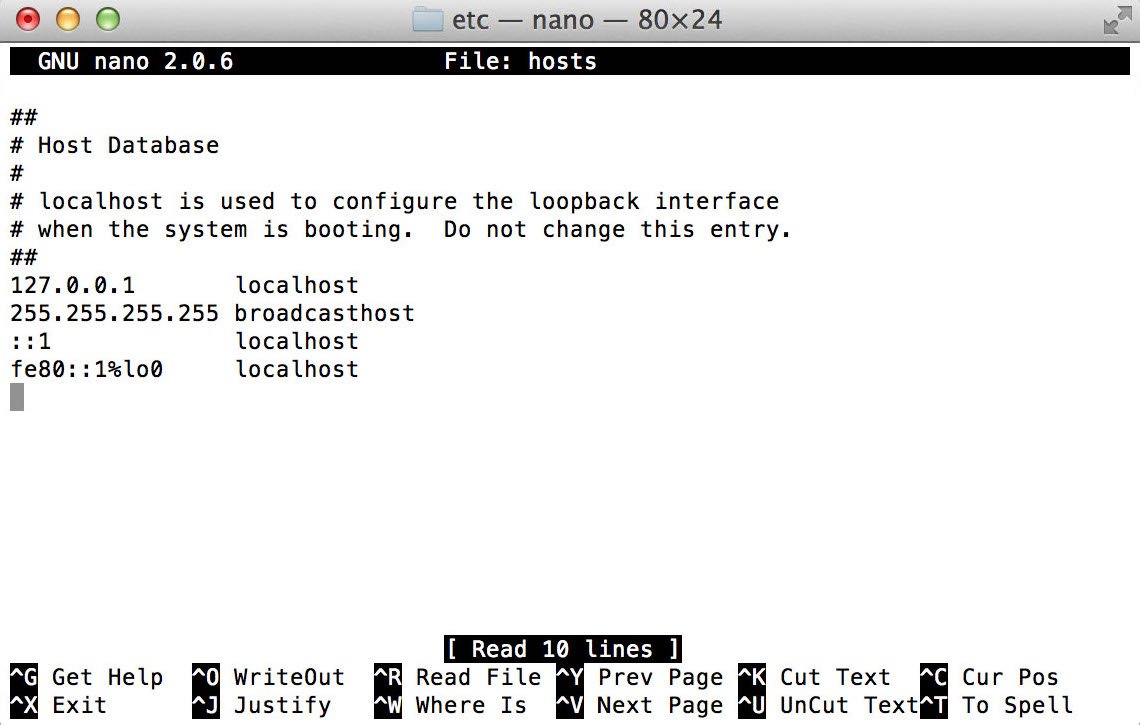
You're now in the Nano text editor. You should see something that looks like this:
If you want to add a new device or domain, move the cursor using the arrow keys and position it after the text in the window. Then, begin typing 🙂
I'll help you skip the typing part, just copy and paste the following addresses there for Spotify 😉
0.0.0.0 weblb-wg.gslb.spotify.com
0.0.0.0 prod.b.ssl.us-eu.fastlylb.net
Once you're done, hold down the Command and O keys to save the file, then Command and Q to exit.
If the terminal is not for you I got another way of doing it.
Again just follow me:
To find the hosts file, open Finder and, in Finder’s menu bar, select Go > Go to Folder. In the box, type the following location and press Return.

A new Finder window will open and your Mac’s hosts file will be selected. Click and drag it out of the Finder window and drop it on your desktop. This will let you freely edit the file.

To open it, simply double-click and it will display the file’s contents in TextEdit (or the text editor of your choice). By default, the hosts file is relatively simple. It contains a number of lines of descriptive text which are “commented out” with the pound or number sign (#). For each line, any text after the pound sign is ignored by the computer, making it a good way to add notes and descriptions to your files. It also contains default IP values for localhost and broadcasthost. To edit the file, you’ll add your own lines after broadcasthost.

Again, just copy and paste the following addresses there for Spotify and save the changes 😉
0.0.0.0 weblb-wg.gslb.spotify.com
0.0.0.0 prod.b.ssl.us-eu.fastlylb.net
If you ever make a mistake or want to change it back and you’re not sure how to fix it, you can always restore the default hosts file contents by using one of the methods above to enter the following default information:
##
# Host Database
#
# localhost is used to configure the loopback interface
# when the system is booting. Do not change this entry.
##
127.0.0.1 localhost
255.255.255.255 broadcasthost
::1 localhost
fe80::1%lo0 localhost
One last thing!
Back at the command line, type sudo killall -HUP mDNSResponder then type return. That will flush your Mac's DNS cache, so it doesn't get confused by any changes you've made to the Hosts file.

Let me know how it goes 🙂